Written Walkthrough
If you’re brand new to this, I strongly recommend you start with watching the video first because it’s much more detailed. Of course, if you’re confident in your technical abilities or just looking for a refresher, then this written guide to the command line is for you!
Step 1: Accessing the Command Line
To navigate the command line in macOS, we use Terminal, which is a built-in application. Terminal is located in the Utilities folder under Applications, and icon for it looks like a black box with an arrow in the upper left corner. With that being said, the actual easiest way to open up Terminal is by searching for it in spotlight– hit enter once it pops up and there you go! The command line!
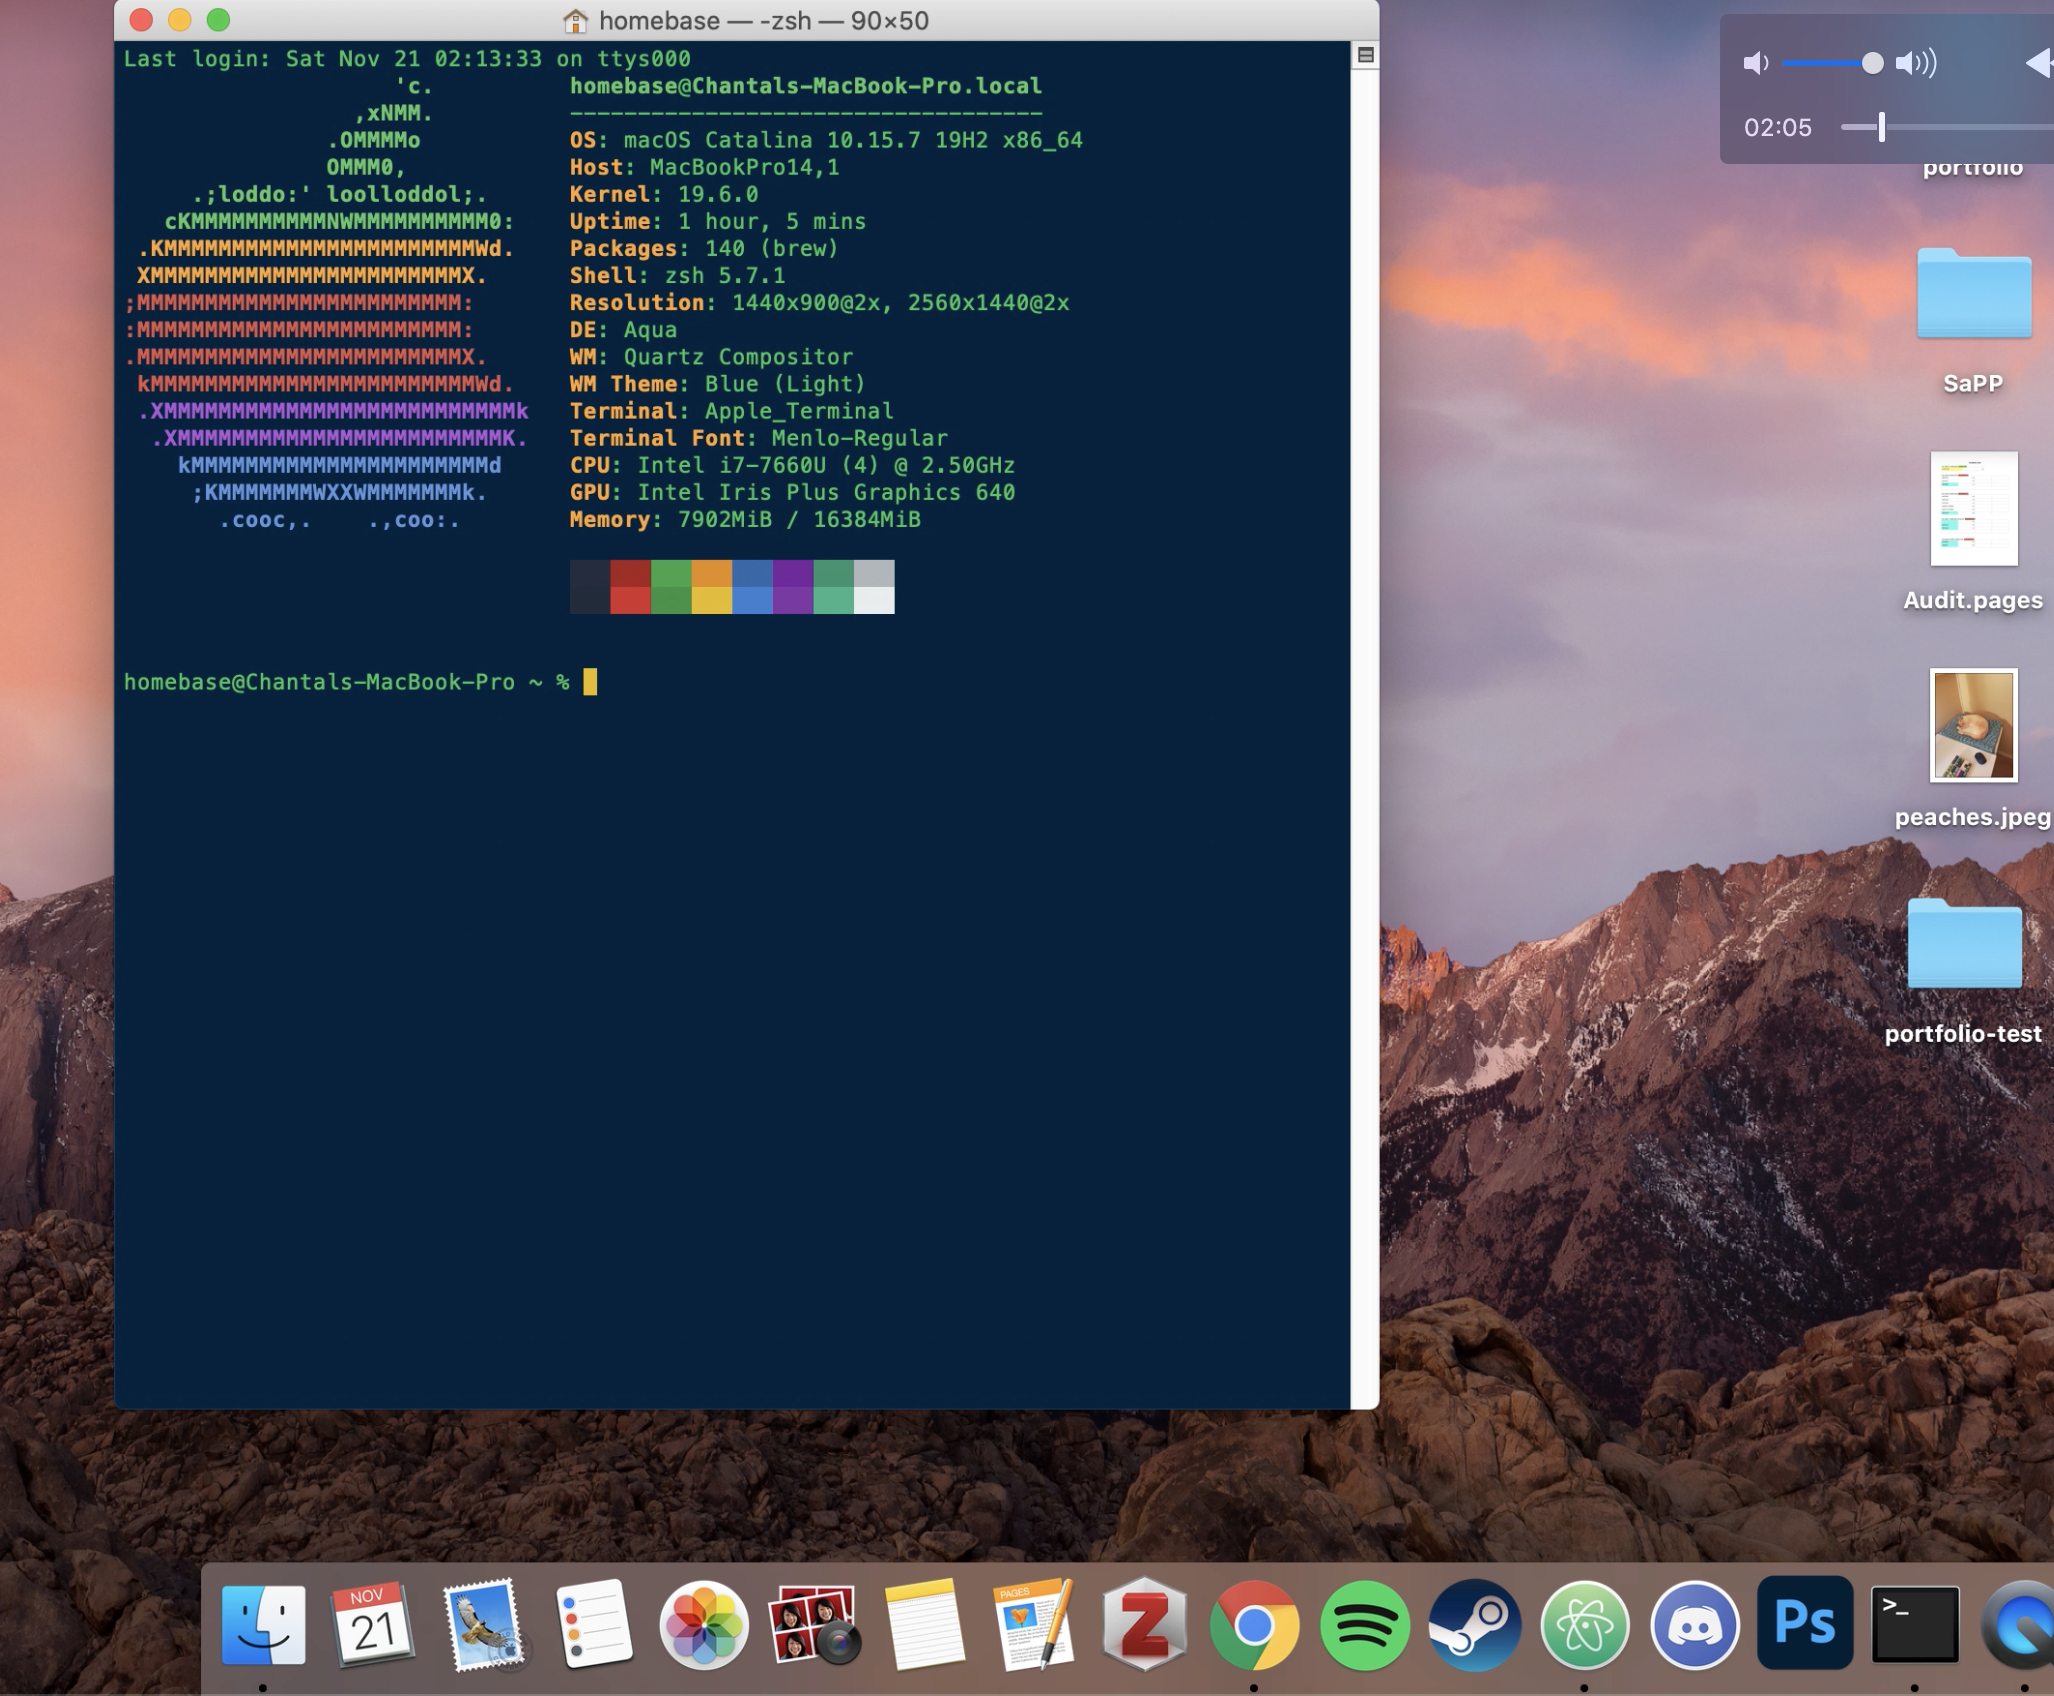
Disclaimer: Your command line will probably look different to mine– because I use it so often I’ve customized it a bit to make it easier to use for myself– BUT you should still have something that looks like this and reads something like:
homebase@Chantals-MacBook-Pro ~ %
Except, obviously, the device name will be yours and not mine (I hope…).
So, now that we have Terminal open, we can ask, what is this? Well, what it is is in the name! The command line is a text interface for your computer aka your whole computer and everything it does in text form
This means that with the command line, instead of clicking to tell it what to do, you type that command instead! In this class, we’ll being mostly using the command line to navigate file directories and run code and software.
A good way to make all of that less confusing is to just start with showing you some basic commands, and we’ll start with the simplest task: navigating directories!
Step 2: Navigating Directories
So a “directory” is essentially a folder on your computer. In Terminal, before the percent, you should see a tilde (the squiggly line), and this tells you that you’re in your home directory! This is where you’ll start each time you open a new Terminal session.
In Finder, it corresponds to the sidebar folder with a house next to it:
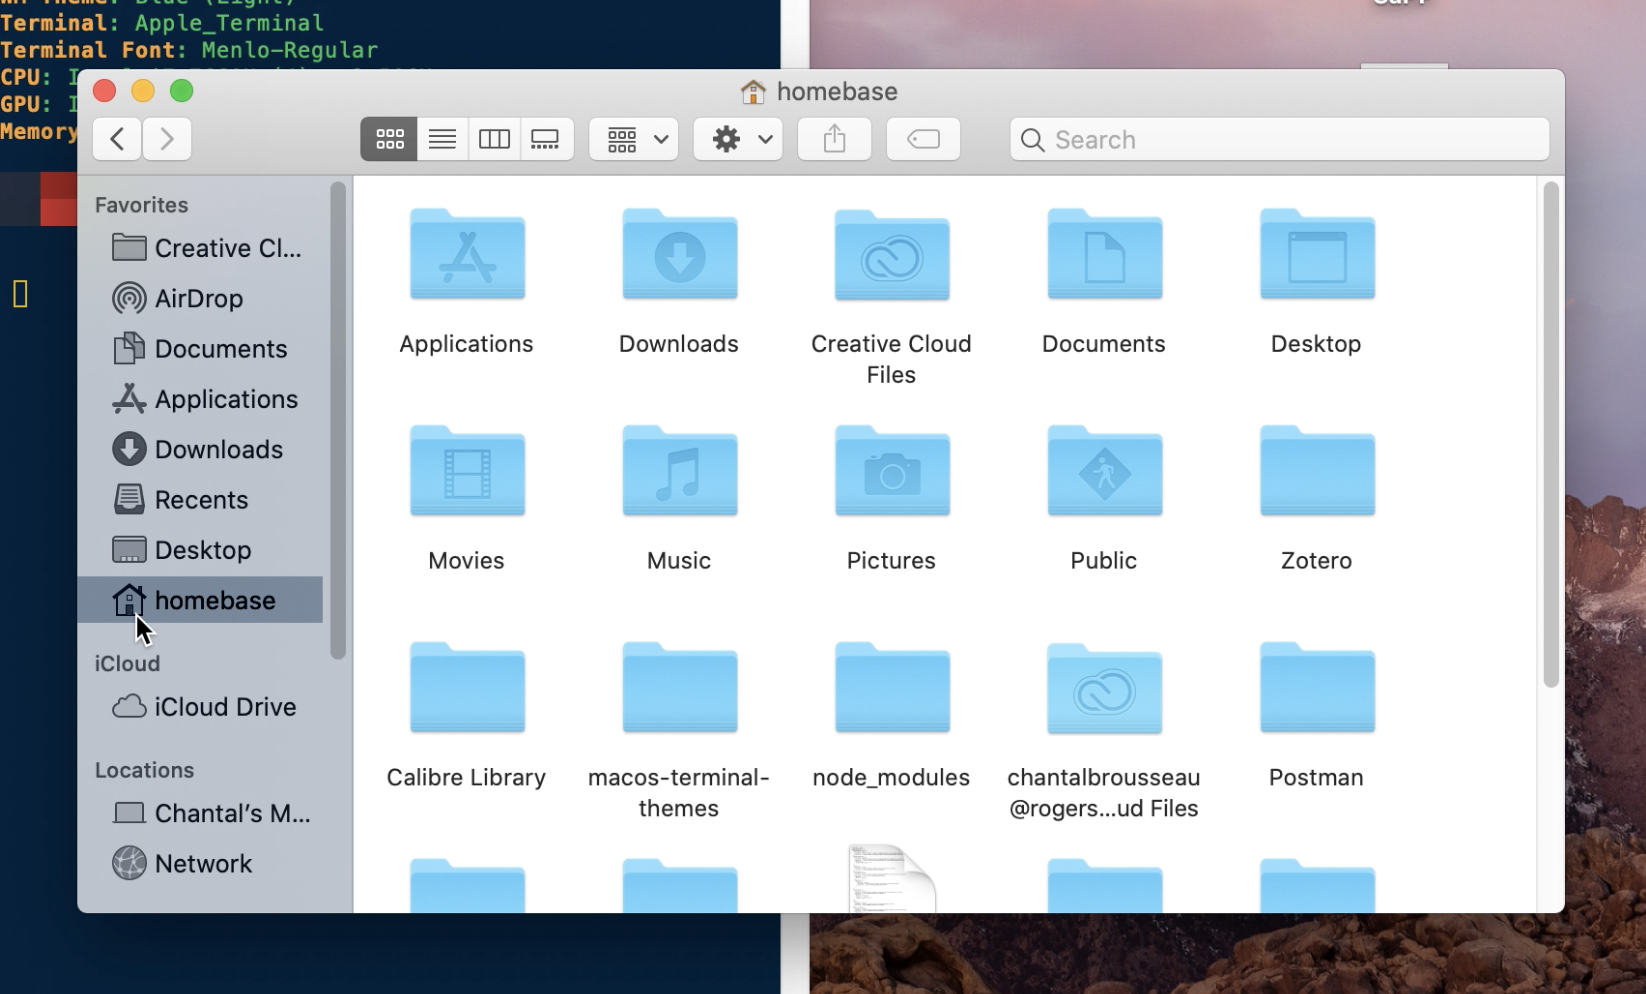
This is basically the Ultimate Folder that has all of the user’s aka your “default” files, and from here you can go anywhere else on your computer.
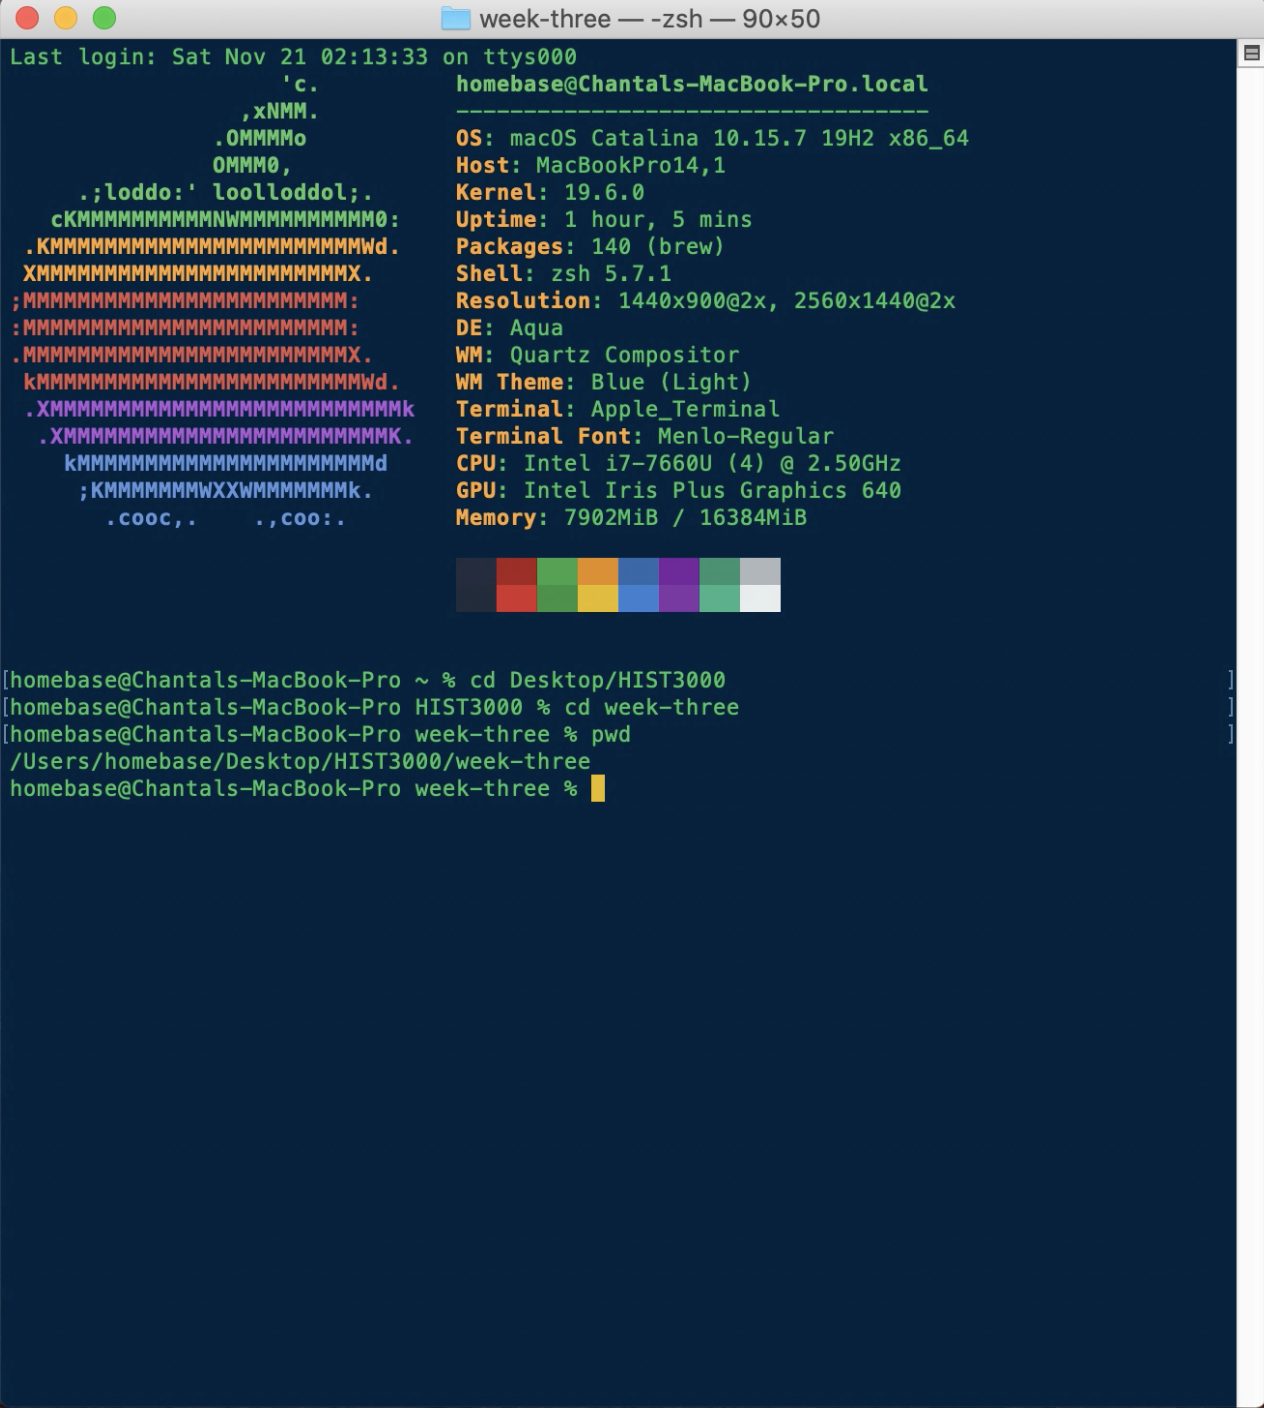
For example, let’s say I want to go to the folder I have on my desktop, HIST3000. First, I’m going to type cd which stands for “change directory”.
The next part after cd is like you’re thinking about where you want to go, then typing it out! So first I need to get to my desktop, and then I want to be in my folder for HIST3000. My entire command looks like this:
cd Desktop/HIST3000
and if I hit enter:
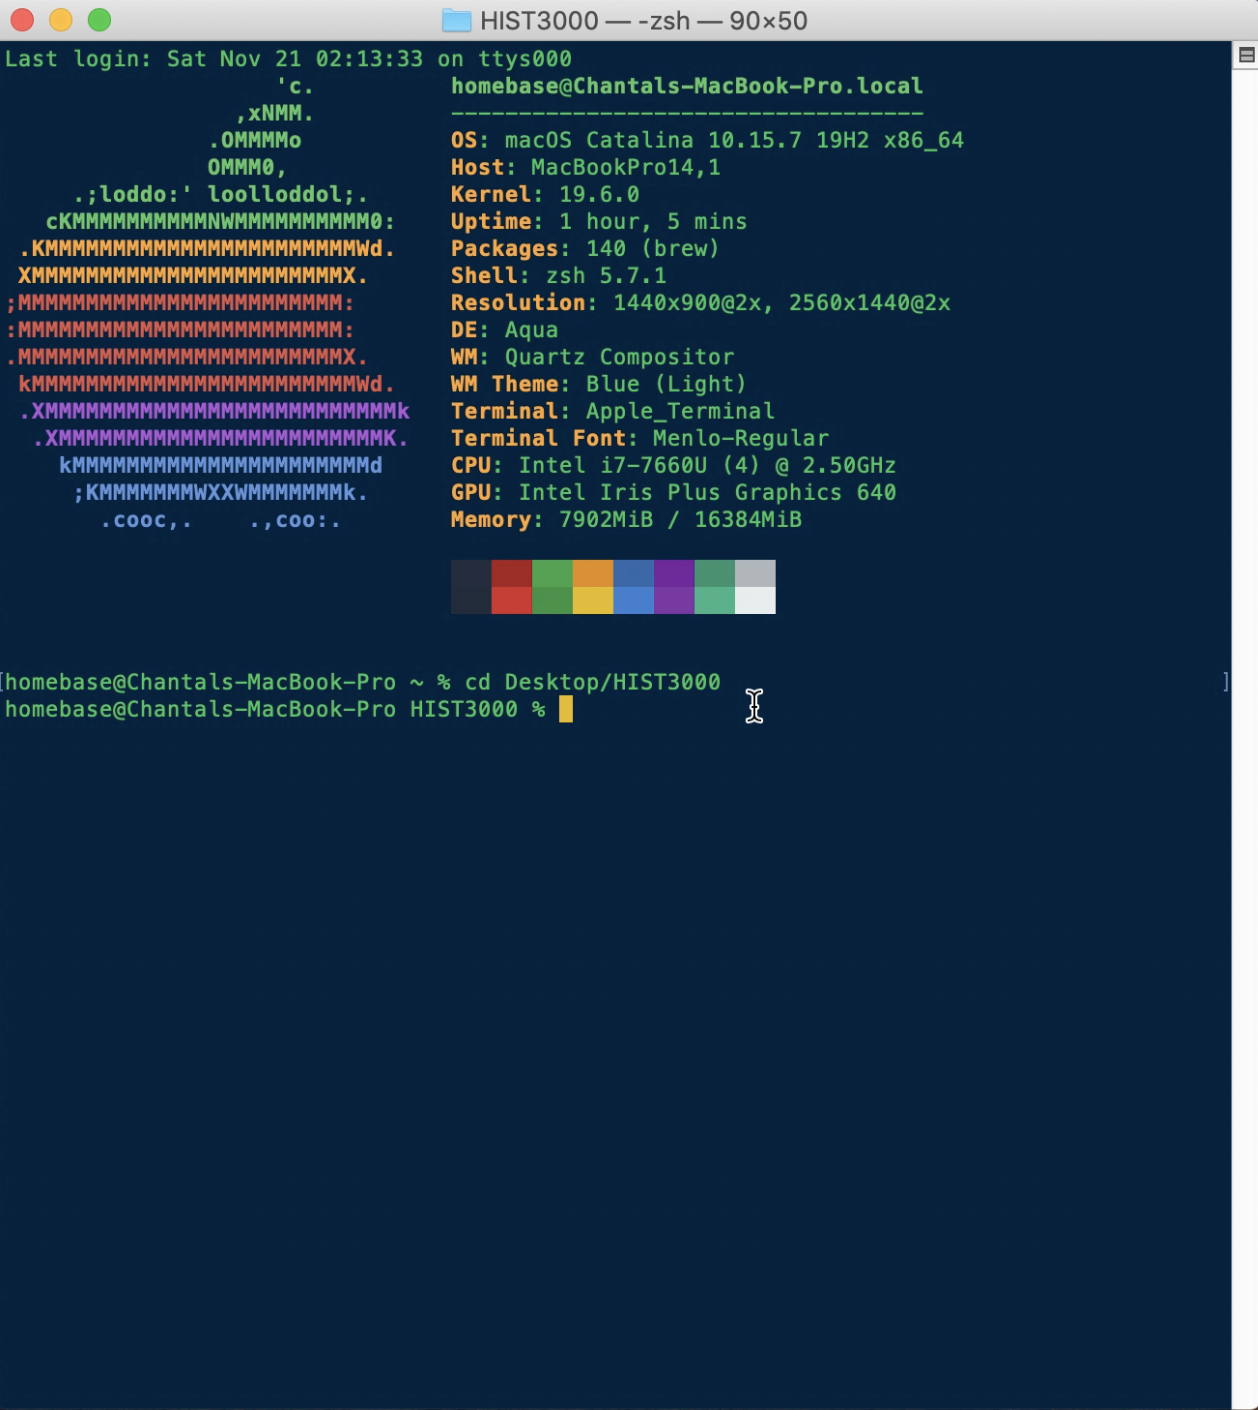
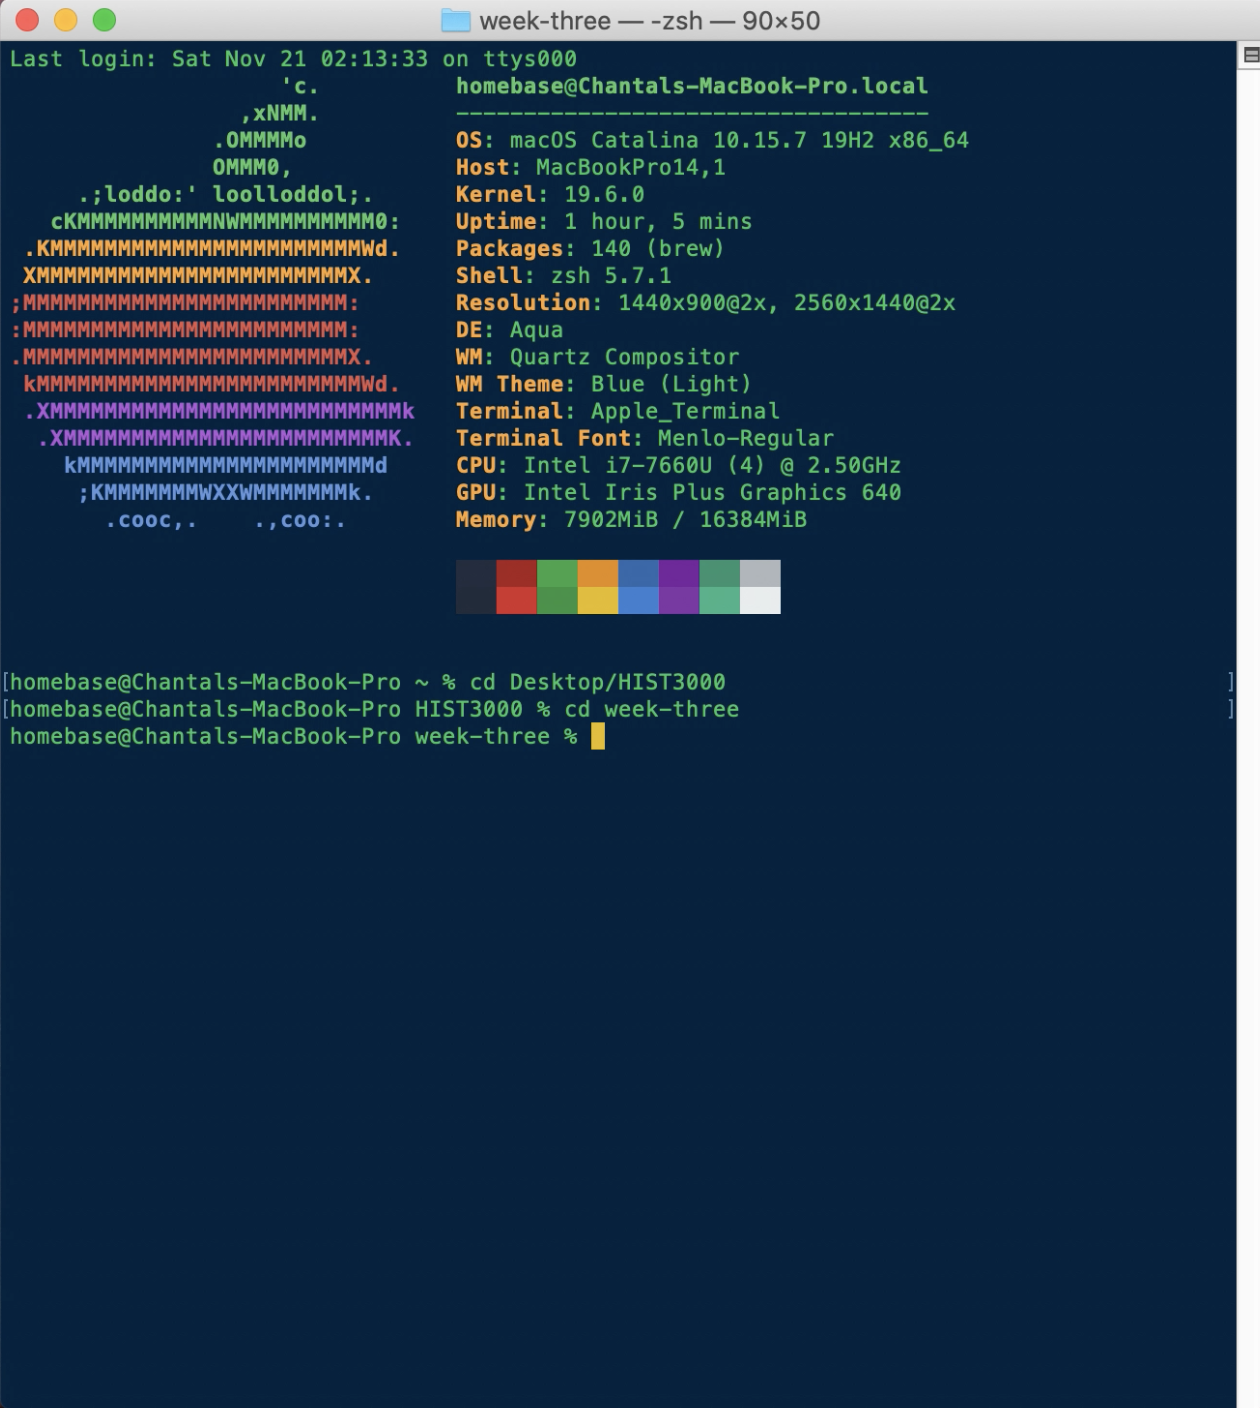
As you can see, as indicated by HIST3000 being before the percent instead of the tilde, I’m now in the HIST3000 folder! If I want to go even further into the folder, I can cd once again:
As you’ve probably extrapolated by this point, part before the percent tells you the folder you’re in, but you can also verify where you are by typing pwd which stands for “print working directory”– the directory you navigated to and are working “in”:
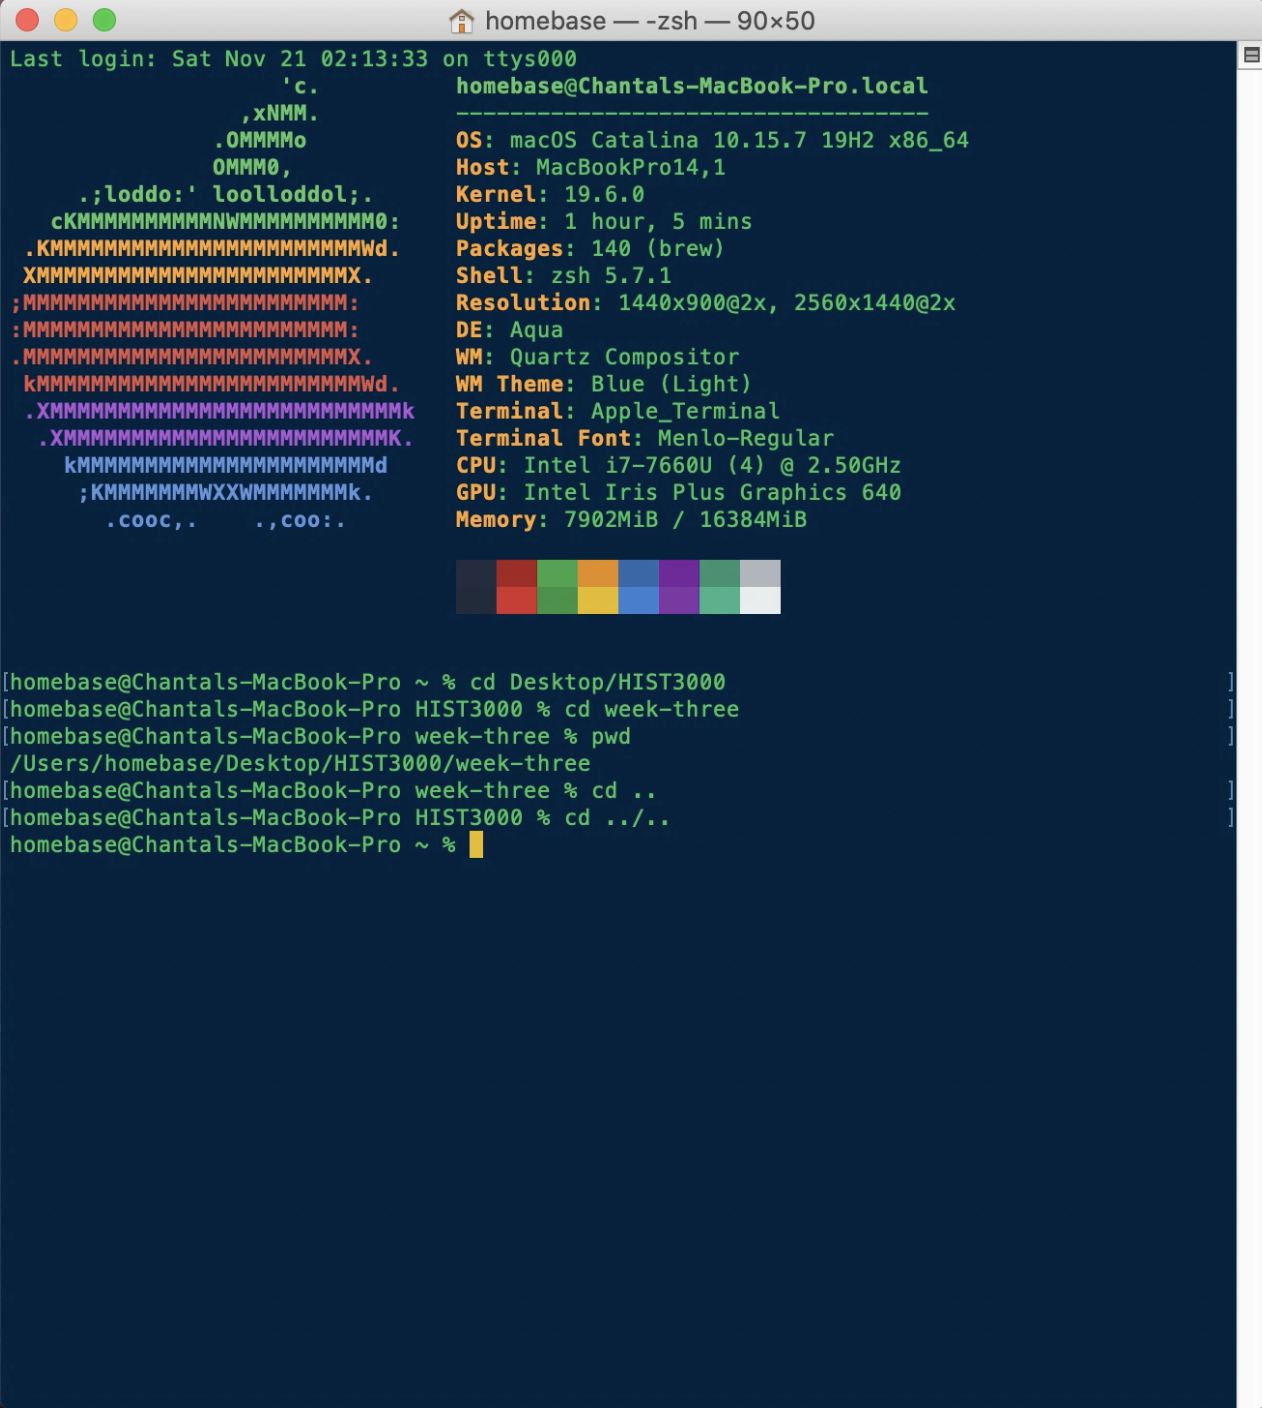
Now let’s say you’ve gone TOO far into a directory, and now you want to go back. I’m just going to back up to my home directory real quick to demonstrate how to do this.
You can go back one directory by typing ... If I type that once, I’m 2 directories away from the home directory, I’m going to enter cd ../.. to go alll the way back like so:
Okay, going back to my HIST3000 folder by accessing my previous commands through hitting “up” on my arrow keys, if you ever want to see what’s actually in your directory via the command line, you can type ls– list!
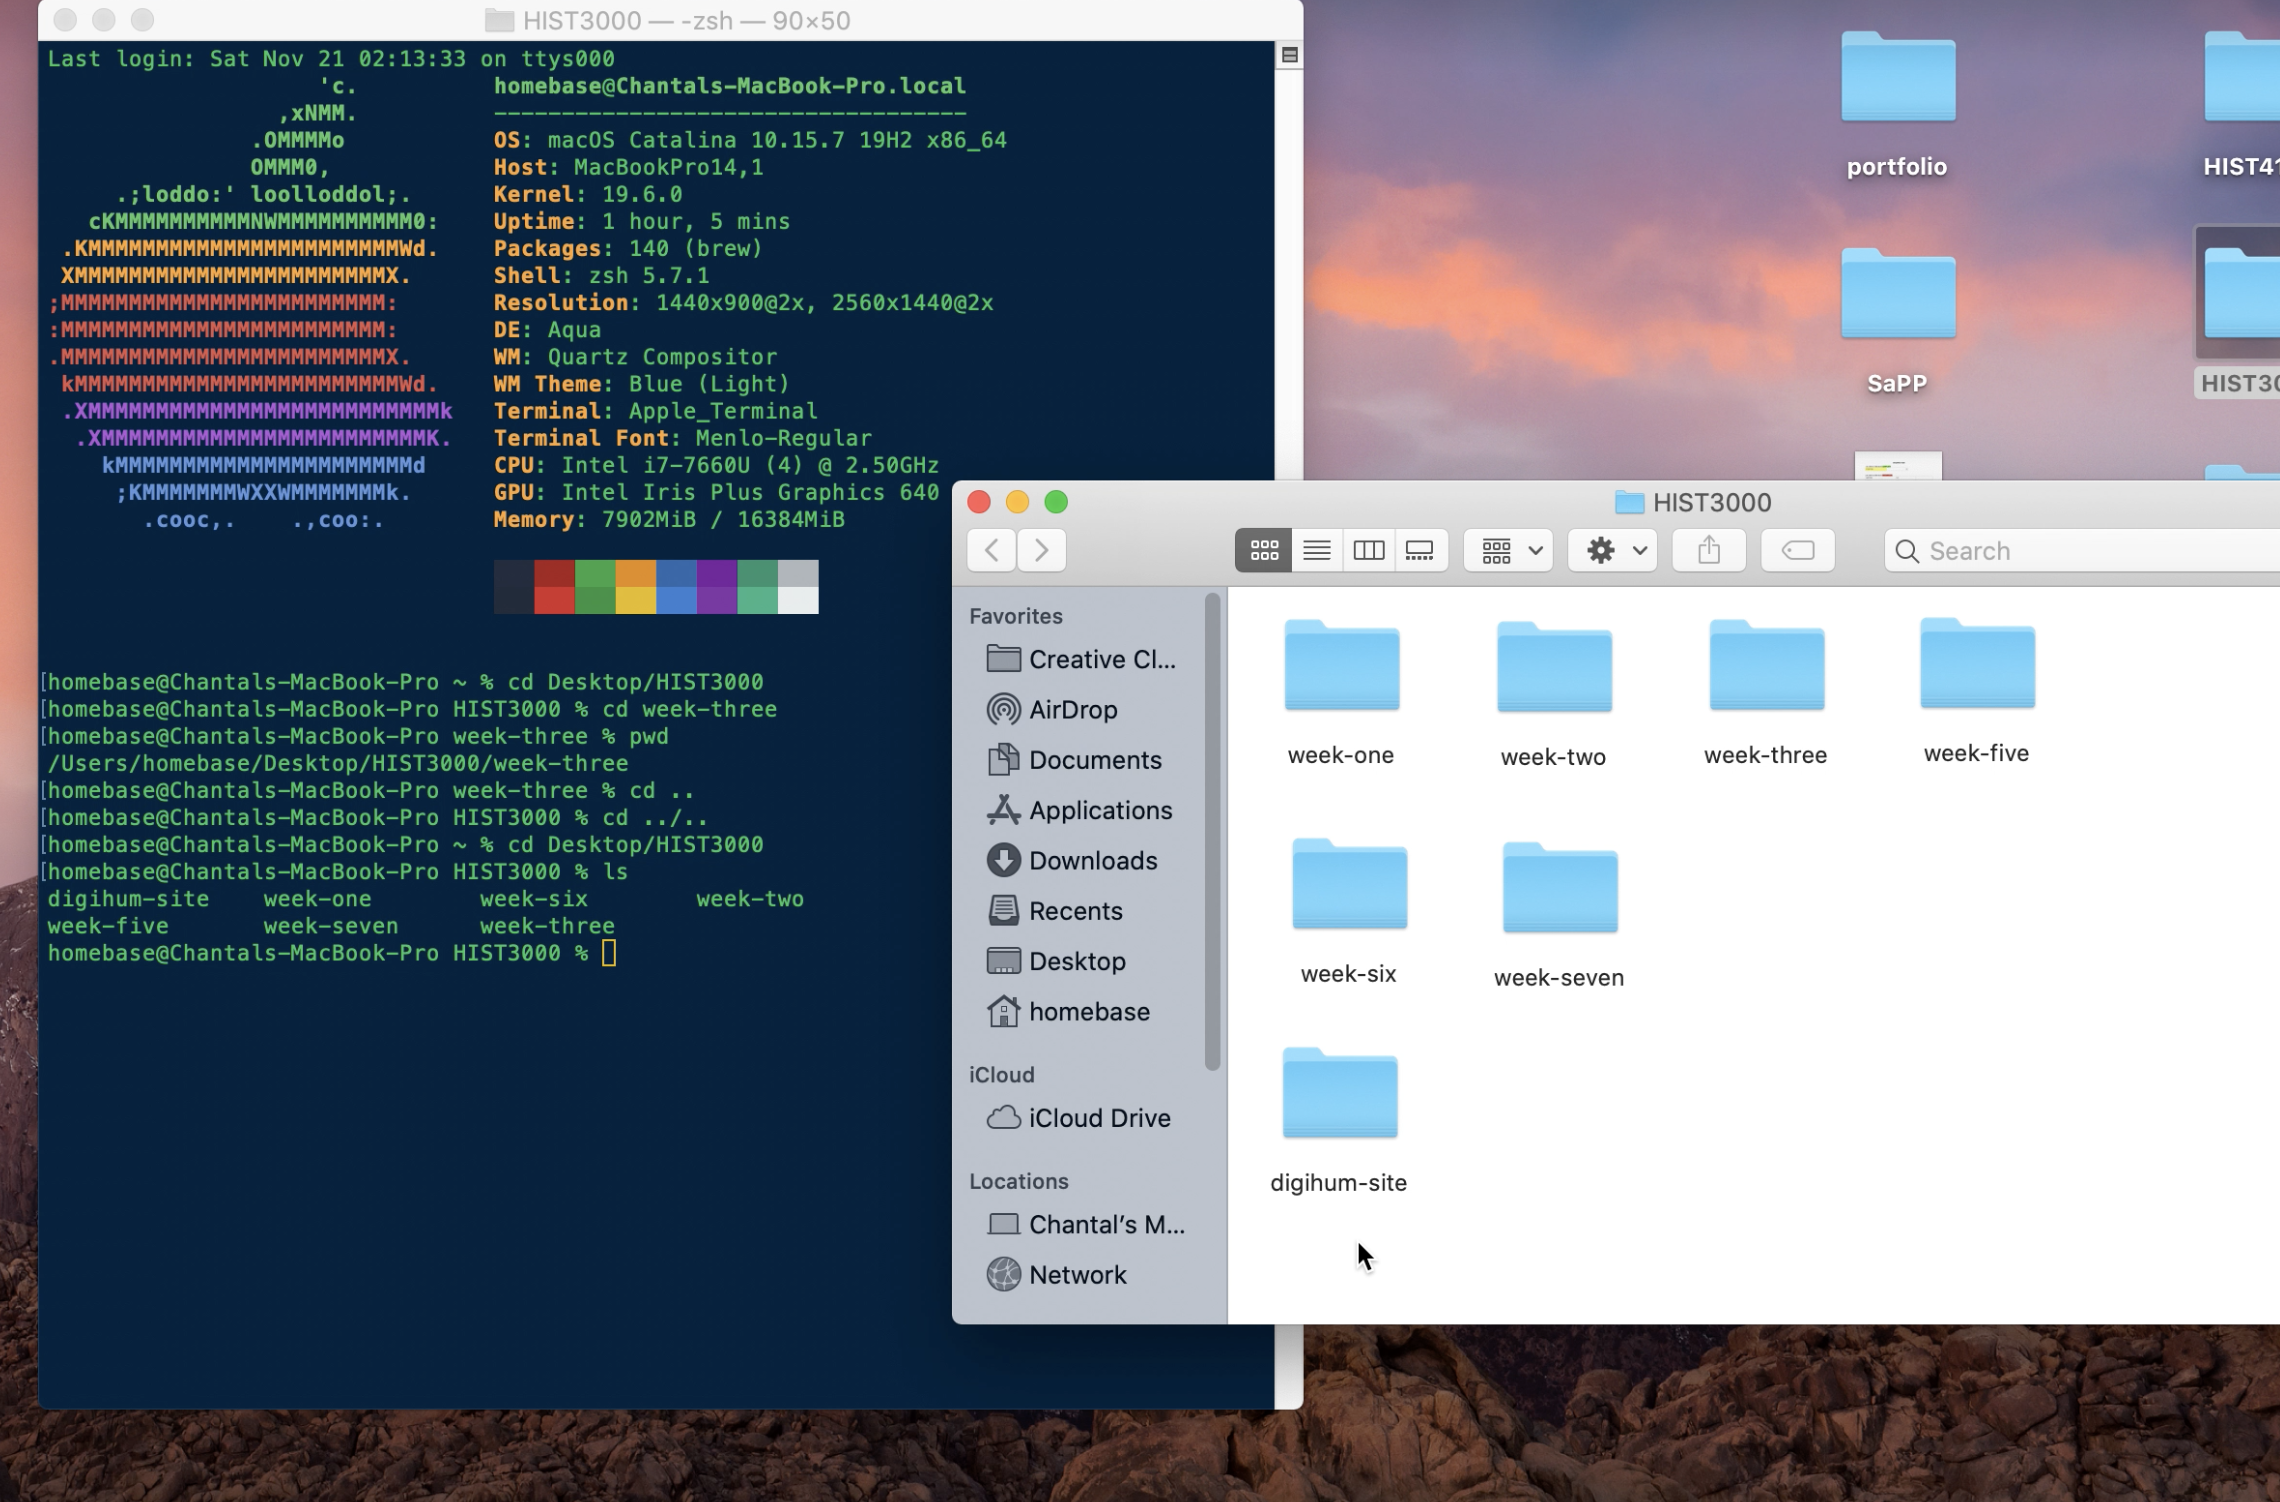
As you can see, the contents printed to the command line and the contents in my HIST3000 folder are identical.
For the next step, we’re just going to clean things up by typing clear. This gets rid of all previous commands and output, but don’t worry, if you scroll up you can still see your past work from this Terminal session.
Step 3: Homebrew
Okay so as macOS users, we’re lucky in the sense that we have a good package manager called Homebrew that can be used in the command line, and this makes a lot of the software that we need for this course very easy and quick to install!
A package manager is essentially a software that installs software– to relate this to something you definitely know about, a package manager is like the App Store without a GUI (GUI stands for Graphical User Interface)! It has numerous apps in it, and lets you install the ones you want with a command instead of a click.
To install homebrew, all you have to do is paste this command into Terminal and hit enter:
/bin/bash -c "$(curl -fsSL https://raw.githubusercontent.com/Homebrew/install/HEAD/install.sh)"
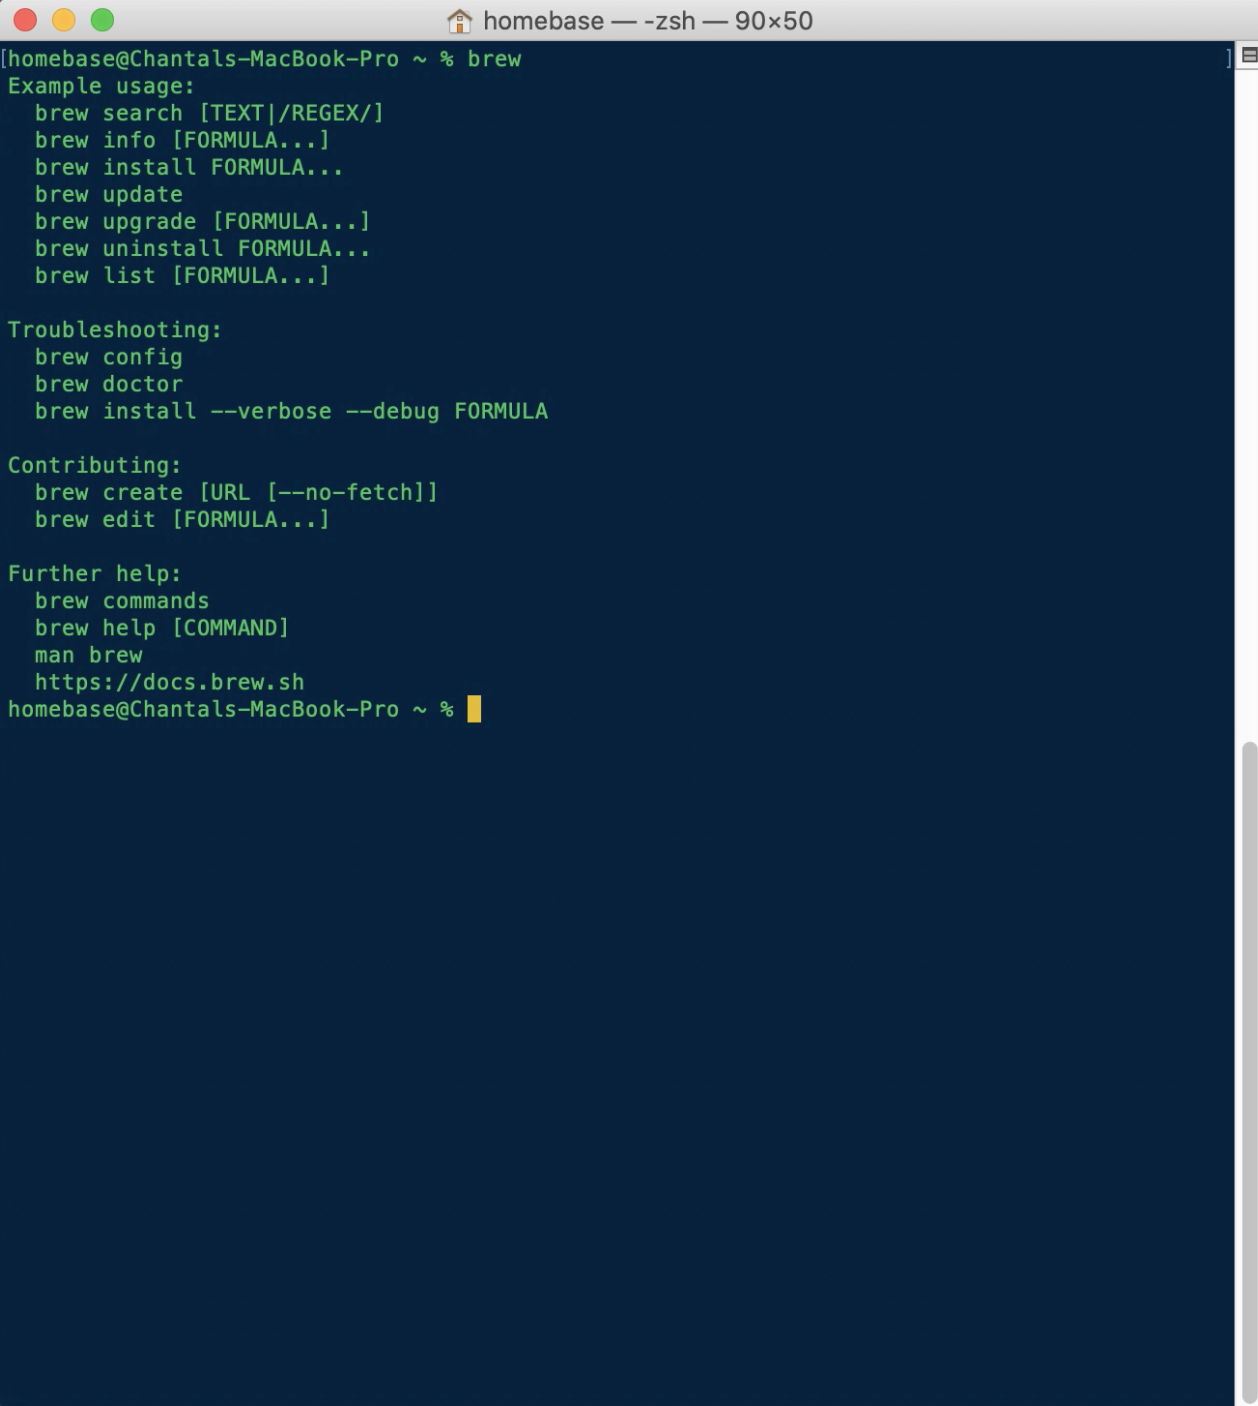
This may take a while to install– to verify it’s installed, just type brew and see if gives you a list of possbile commands like so:
I WILL show you quickly how to install something using brew just so you know what a finshed install state looks like, and if you follow along with this part then you’ll have a fun way to mess with your friends!
To install via brew, the command will start with brew, summoning the package manager.
IF you are installing something that has a GUI then the next word would be cask but we aren’t doing that right now so no need to add it.
The next thing you type is install, indicating the action you want to perform using homebrew, and finally the name of what you want to install, which in this case is no-more-secrets. The full command should look like:
brew install no-more-secrets
Hit enter and run that, then once it’s installed you should see this:
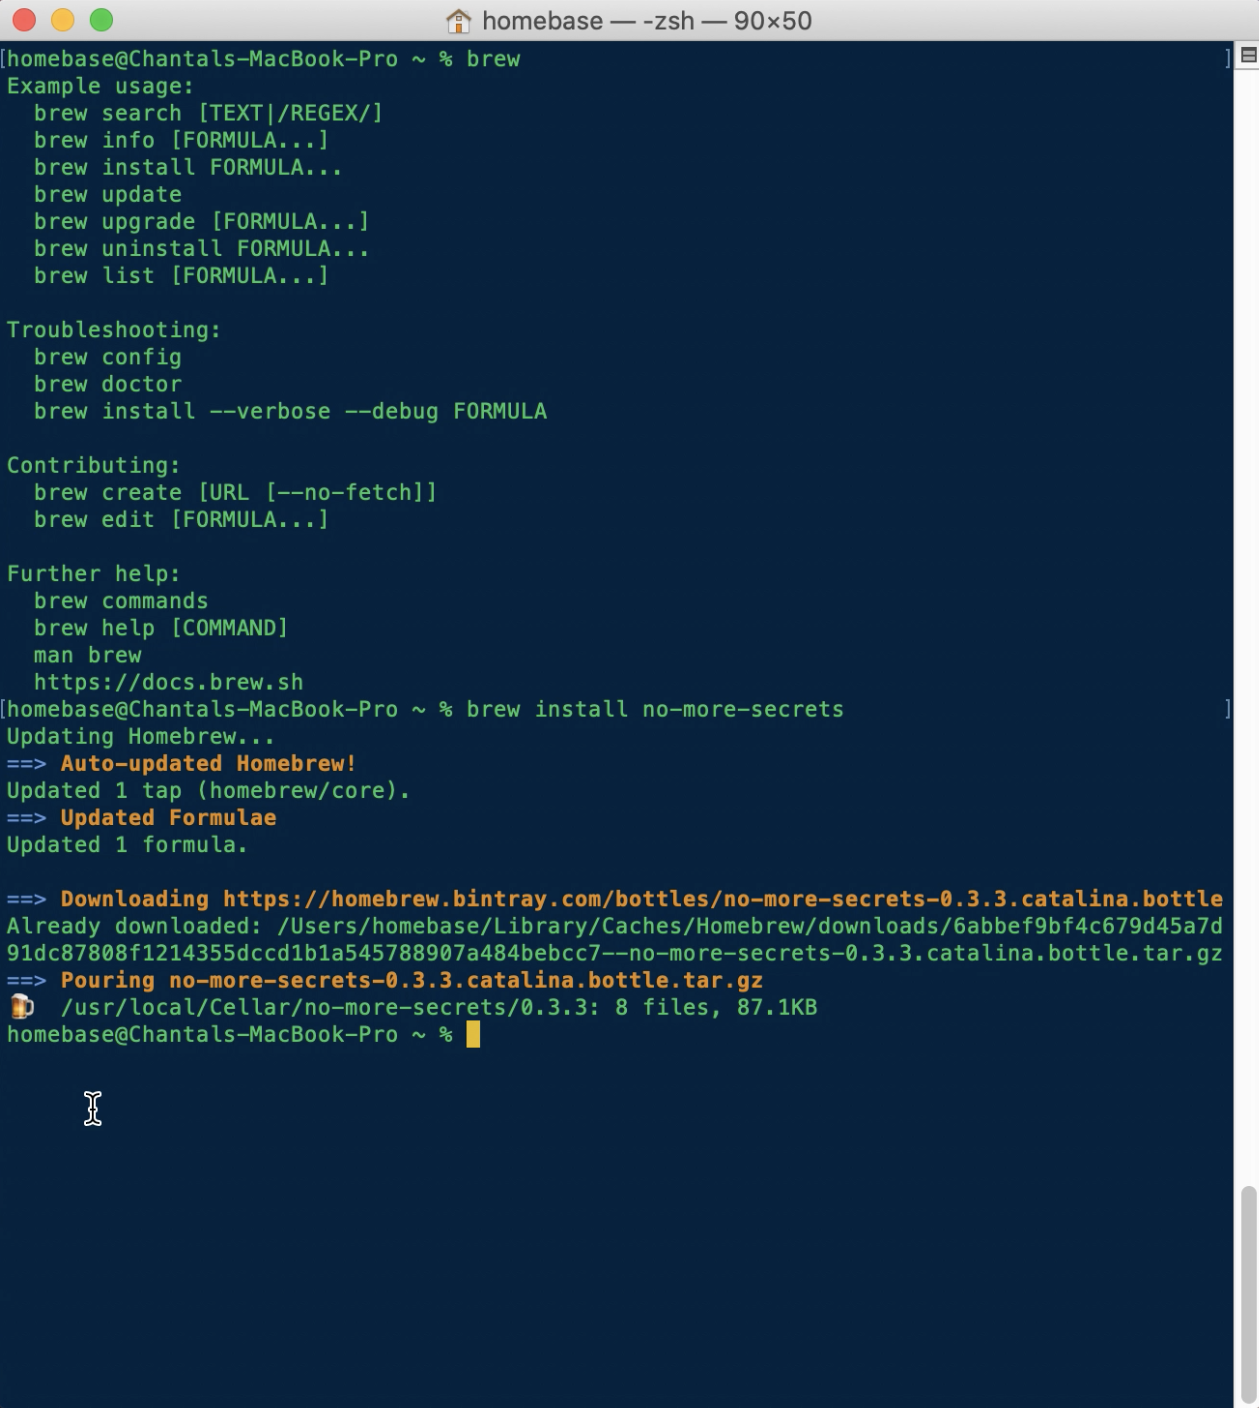
This paticular program just lists all of the files of the folder you’re in by scrambling the names and slowly unscrambling them to make it look like stereotypical hollywood hacking.
You need to run ls | nms, where ls means the same as what we learned before, and the line is a “pipe” indicating the specific thing you want to run ls through, which for us is nms aka no-more-secrets. Don’t worry, you can uninstall this just as easily as installing by entering brew uninstall no-more-secrets.
Step 4: Manuals
Lastly, if you ever need help using a tool you installed via the command line, you can easily access a manual on it within Terminal!
For example, git, a version control system we’ll be using in this course has a manual that can be accessed by entering man git, “man” telling the computer you want a manual, and the word following it indicating what you want a manual for. As soon as you hit enter, this should appear:
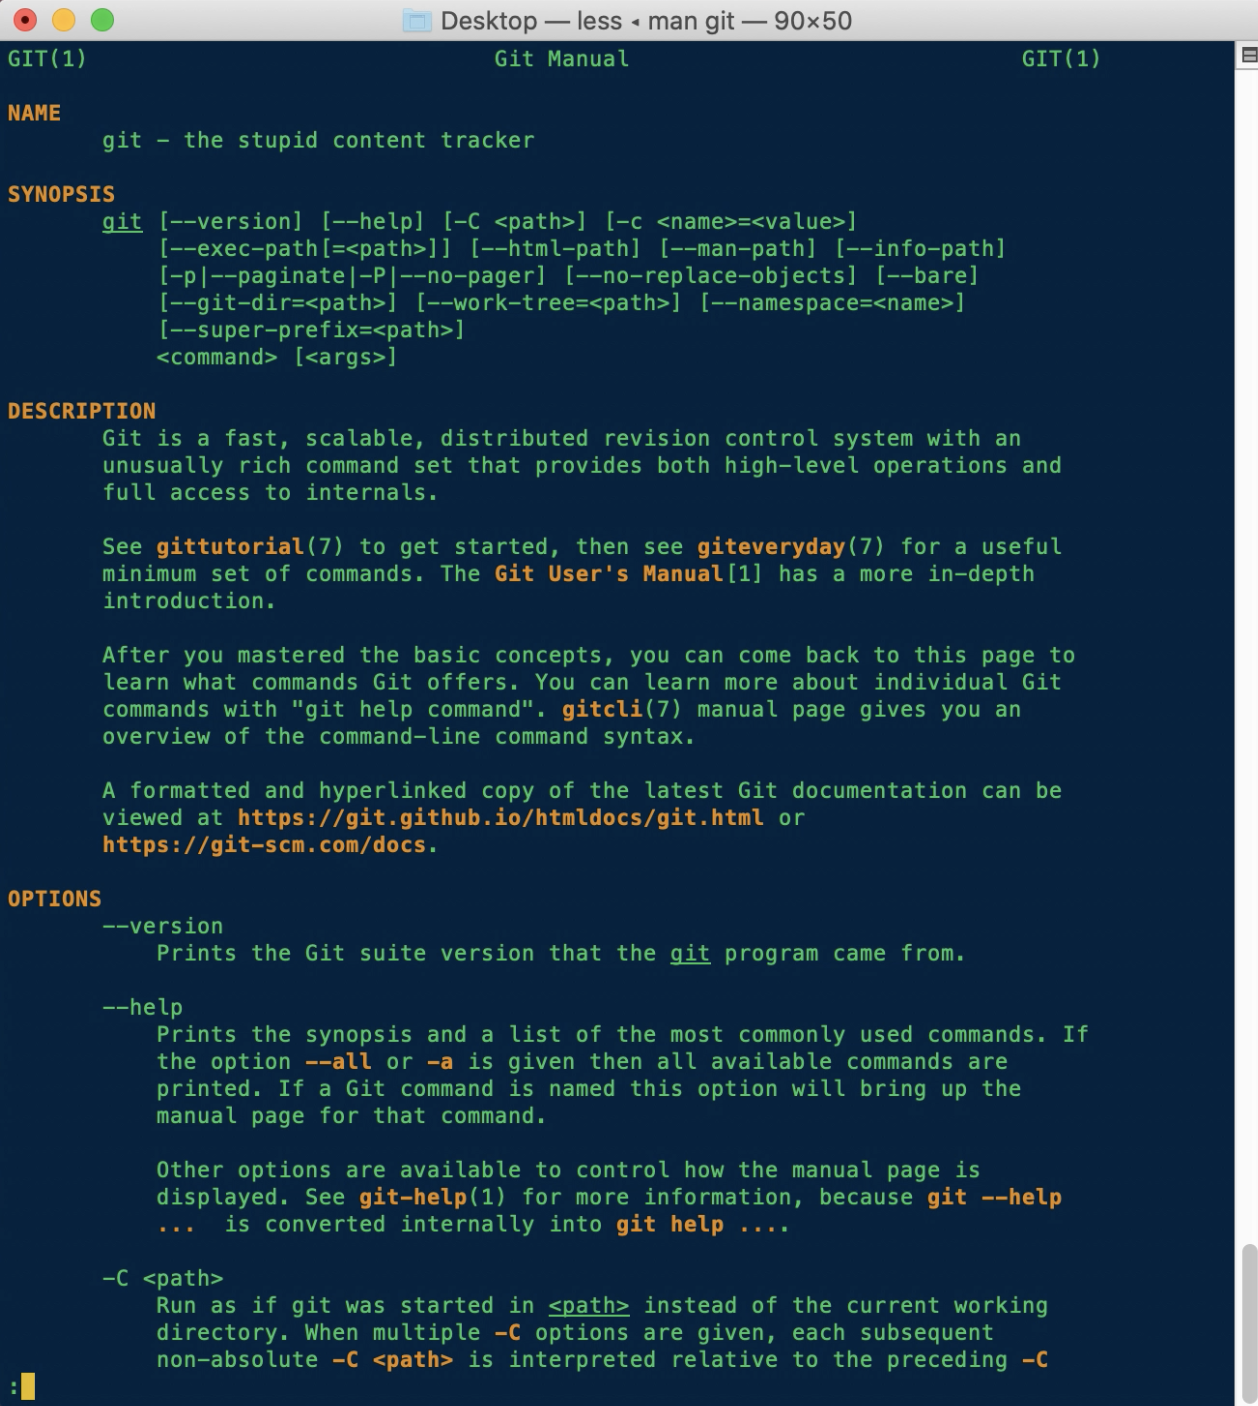
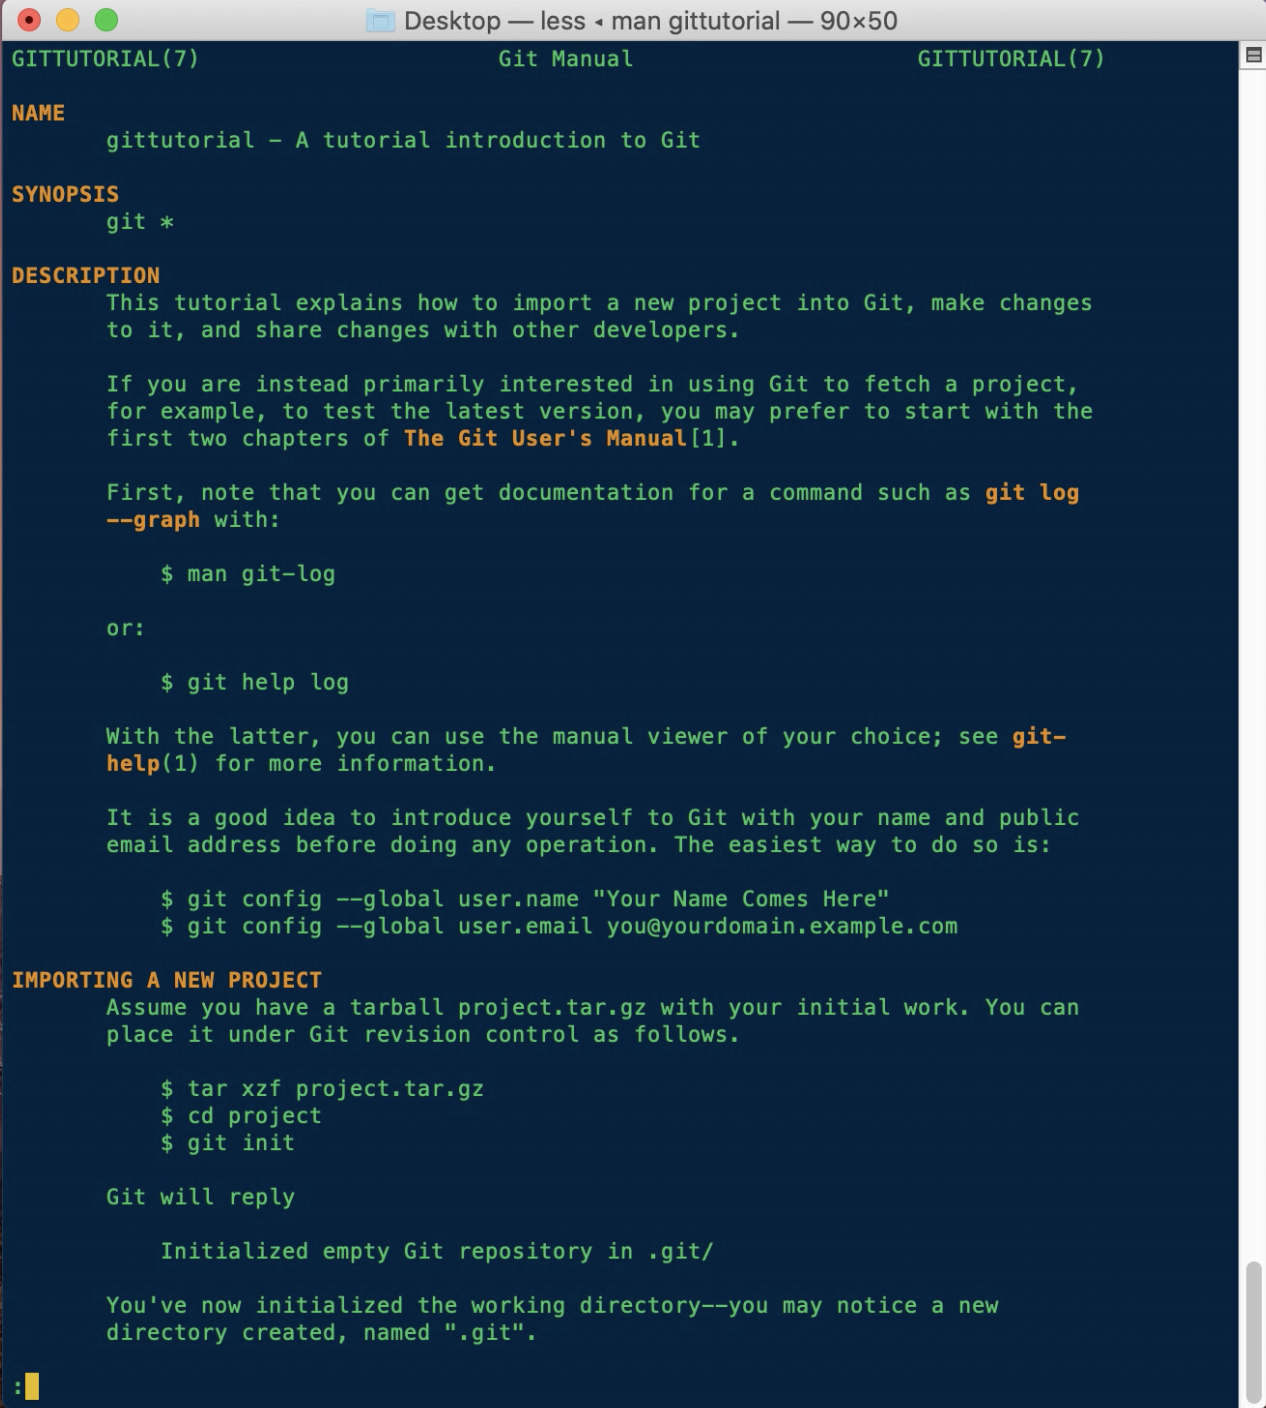
If you look at the highlighted text, you’ll notice that this manual refers to further nested manuals that include more detail, and you can access these by exiting this manual by typing q (for quit) then going to that specific seciton by typing man and section name. For example, gittutorials would look like:
And that’s all! hit cmd + q to quit the Terminal! Now you know how to use the command line well enough to succeed in this class.
Step 5: Additional Resources
To help you get more familiar with the command line, firstly, here’s a cheatsheet that details the numerous other things you can do from the command line.
Secondly, here are some links to how you can customize your Terminal to look more like mine: